Why the Smokey Eye is a Timeless Look
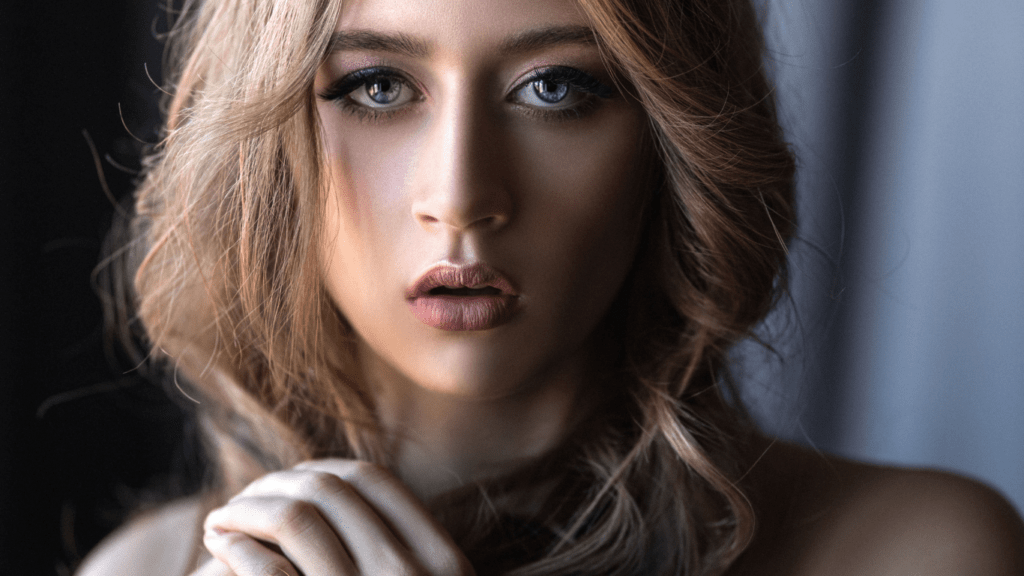
The smokey eye remains a go-to makeup look for decades. Its versatility suits various occasions, from casual outings to glamorous events. A key factor is its ability to complement different eye shapes and colors, making it universally flattering.
This look’s origins date back to ancient Egypt, where kohl was used to create dramatic, dark-lined eyes. Over time, celebrities and fashion icons have popularized it, cementing its status in beauty history. Icons like Brigitte Bardot and Sophia Loren showcased this look, leading to its enduring appeal.
Creativity and personal expression drive the timelessness of the smokey eye. Different color palettes, ranging from classic black and gray to bold hues like plum and emerald, allow for endless customization. Techniques and finishes vary, making it a versatile and ever-evolving look.
In addition to aesthetic beauty, the practical aspect of the smokey eye can’t be ignored. It’s relatively easy to achieve with practice, requiring minimal tools—just a few well-chosen eyeshadows, an eyeliner, and a blending brush. Whether aiming for a subtle effect or a bold statement, the smokey eye delivers.
This trend also aligns with contemporary makeup preferences. The emphasis on bold eyes provides a focal point, drawing attention and enhancing overall facial features. It’s adaptable, allowing the wearer to adjust intensity based on the occasion, making it perfect for various settings.
Fashion runways and red carpets consistently feature smokey eyes. It remains a staple in makeup artists’ repertoires, often seen on movie stars and influencers. Its consistent presence in pop culture influences its staying power.
The enduring popularity of the smokey eye proves it’s more than a passing trend. Its historical significance, versatility, and ease of application make it an essential skill for any makeup enthusiast.
Essential Tools and Products
To master the art of smokey eyes, possessing the right tools and products is crucial. These items not only simplify the process but also enhance the final look.
Brushes You Need
Using the right brushes makes a significant difference. Here are the essential ones:
- Blending Brush: Use a fluffy blending brush to seamlessly blend shades for a well-diffused finish.
- Shader Brush: A flat shader brush helps pack color onto the lids, ensuring maximum pigment.
- Smudge Brush: Utilize this small, dense brush to smudge eyeshadow along the lash line for added depth.
- Angled Brush: An angled brush allows for precise application of darker shades in the crease.
Must-Have Products
High-quality products are key to achieving a flawless smokey eye. These essentials should be in your kit:
- Eyeshadow Palette: Opt for a versatile palette with a range of matte and shimmer shades. Examples: Urban Decay Naked Palette or Morphe 3502 Second Nature Palette.
- Eyeliner: A good black or dark brown eyeliner is vital for defining the lash line. Examples: Maybelline Eye Studio Gel Liner, or Stila Stay All Day Waterproof Liquid Eyeliner.
- Mascara: Lengthening and volumizing mascara finishes the look. Examples: L’Oréal Paris Voluminous Lash Paradise or Too Faced Better Than Sex Mascara.
- Eye Primer: An eye primer ensures long-lasting and crease-free eyeshadow. Examples: Urban Decay Eyeshadow Primer Potion or NYX Proof It! Eyeshadow Primer.
Equipped with these brushes and products, creating a stunning smokey eye becomes much more achievable.
Step-by-Step Guide to Creating Smokey Eyes

Mastering smokey eyes involves keen attention to detail and proper techniques. Follow these steps to achieve a flawless smokey eye look.
Preparing Your Eyes
Start by cleaning your eyelids, removing any oil or makeup residue. Apply a primer to ensure your eyeshadow stays in place and appears more vibrant. Use a quality eye primer like the Urban Decay Eyeshadow Primer Potion for best results.
Applying the Base
Choose a neutral eyeshadow shade close to your skin tone. Sweep this shade across your entire eyelid using a flat shader brush. This base helps blend subsequent colors seamlessly. An eyeshadow palette with a range of shades, such as the Anastasia Beverly Hills Modern Renaissance, works well.
Blending Techniques
Use a mid-tone transition shade and apply it to your crease with a fluffy blending brush. Keep your motions light and circular to avoid harsh lines. Blending is crucial for a smokey eye look, so ensure the transition shade smoothly merges with your base color.
Adding Depth and Dimension
Apply a darker eyeshadow shade to the outer corner of your eyelid. Use a smaller blending brush for precision. Gradually build the intensity, concentrating the color on the outer V and blending inward to create depth. A shade like MAC’s Carbon can add the necessary drama to your look.
Finishing Touches
Line your upper and lower lash lines with a dark eyeliner, and smudge it slightly for a softer effect. Finish with several coats of volumizing mascara. For a more dramatic flair, add false eyelashes. Highlight your inner corners and brow bone with a light, shimmery shade to brighten your eyes.
Common Mistakes to Avoid
Even seasoned makeup enthusiasts can make mistakes when perfecting the smokey eye look. Knowing what to avoid helps achieve a flawless finish.
Over-Blending
Over-blending muddles colors, losing definition. Always aim to create a gradient where the shades transition smoothly. Excessive blending can blur the lines between shades, making it challenging to discern depth. Use a light hand and blend just enough to soften harsh lines.
Choosing the Wrong Colors
Choosing the wrong colors can make the look appear off. Your eye color and skin tone should guide your color choices. For brown eyes, rich browns and golds enhance depth. Blue eyes pop with grays and silvers. Green eyes stand out with purples and plum shades. Ensure the chosen palette compliments your natural features.
Expert Tips and Tricks
Achieving the perfect smokey eye takes practice, but there are several expert tips and tricks to keep in mind. Here are key techniques to elevate your look:
Use the Right Tools
High-quality brushes and blending tools make a big difference. Invest in a good blending brush, a flat eyeshadow brush, and a smudge brush. Clean your brushes regularly to maintain the best application.
Choose the Right Palette
Select eyeshadow palettes with complementary colors. Neutrals, grays, and blacks work well for a classic smokey eye. Try experimenting with dark browns, purples, or greens for a unique twist.
Prime Your Eyelids
Always start with an eyeshadow primer. It keeps your makeup in place, prevents creasing, and enhances the eyeshadow’s pigment. Apply a small amount and blend it evenly across your lid.
Layer Your Shadows
Start with a light base color across the eyelid. Gradually add darker shades to the crease and outer corners of your eyes. Blend each layer well to avoid harsh lines. Use a windshield wiper motion for the best results.
Blend, Blend, Blend
Blending is crucial for a seamless smokey eye. After applying each shade, use a clean blending brush to soften any edges. This step ensures a gradient effect rather than blocky colors.
Highlight Strategically
Use a light, shimmery shade to highlight the brow bone and inner corners of your eyes. This technique adds dimension and makes your eyes pop.
Line and Smudge
Apply eyeliner close to your lash line. Then, use a smudge brush to soften the line for a smoky effect. For a more intense look, use a gel or kohl liner and slightly smudge it.
Finish with Mascara
Complete your look with volumizing mascara. Apply several coats to achieve bold, thick lashes that enhance the smokey effect.
Set Your Look
To ensure your smokey eye lasts, use a setting spray. It locks in the makeup and helps maintain the fresh look throughout the day. Hold the spray at arm’s length and mist lightly over your face.
These expert tips and tricks streamline the process of creating a flawless smokey eye, enhancing both the technique and the final look.


 Creative Director at Divine Glamour Trail, is the visionary behind the platform, which is dedicated to bringing readers the latest trends in hairstyles, beauty, and skincare. With a passion for timeless fashion and expert style guidance, George provides tips, secrets, and updates that empower individuals to enhance their personal style. His platform is a go-to source for anyone looking to stay ahead in the fashion game, combining modern trends with timeless elegance to help readers feel confident and look their best.
