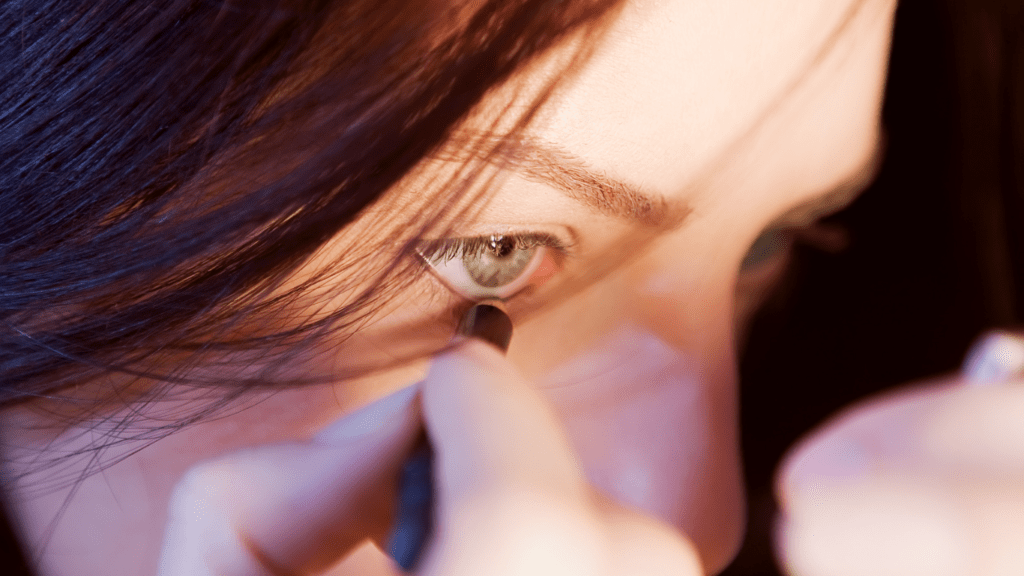
Understanding Winged Eyeliner
Winged eyeliner creates an elongated, uplifted look that enhances the eyes. It’s achieved by extending the eyeliner past the outer corner of the eye, forming a flick or wing shape. Grasping this concept is crucial for those seeking to elevate their makeup skills.
The style of winged eyeliner can be powerful or subtle, depending on the preferred look and occasion. A slight flick gives a natural lift, ideal for everyday wear. A dramatic wing takes more practice but delivers a bold effect perfect for special events.
Not all eye shapes benefit from the same winged eyeliner approach. For almond-shaped eyes, following the natural curve and a longer wing emphasizes their symmetry. Hooded eyes require a thicker line to prevent the eyelid from concealing the wing when the eye is open. Round eyes benefit from an upward flick, adding a touch of elongation to their natural shape.
Choosing the right tools simplifies the process. Liquid liners offer precision but require steady hands. Gel liners provide a balance of control and pigmentation, suitable for most users. Pen liners are beginner-friendly, giving consistent lines with minimal effort.
Practice remains essential. Using techniques like mapping the angle with dots before connecting the line ensures accuracy. Taping the outer corner of the eye guarantees a crisp edge, invaluable for beginners. Without understanding and adapting these practical aspects, mastering winged eyeliner becomes far more elusive.
Tools You Will Need
Achieving the perfect winged eyeliner requires the right tools. I’ve identified essential products and optional tools that can enhance your precision.
Essential Products
- Liquid Eyeliner: Provides a bold, defined line. Use brands like Stila or Kat Von D for consistent results.
- Gel Eyeliner: Offers a smoother application with a brush. Maybelline’s Eye Studio Gel Liner is a reliable choice.
- Pen Eyeliner: Combines the boldness of liquid with the control of a pen. Try NYX Epic Ink Liner for its easy handling.
- Angled Brush: Necessary for applying gel eyeliner. Sigma’s Small Angle Brush ensures precise lines.
- Makeup Remover: Corrects mistakes without smudging. Micellar water works well for quick fixes.
- Eyeliner Stencils: Simplify achieving symmetrical wings. Available from Sephora and other beauty stores.
- Tape: Creates a straight edge for guiding your eyeliner. Scotch tape works in a pinch.
- Q-Tips: Helps clean up edges for sharper lines. Choose pointed Q-tips for better accuracy.
- Mirror with Magnification: Provides a closer view during application. Investing in a magnifying mirror can make a difference.
- Setting Spray: Ensures your eyeliner lasts all day. Urban Decay’s All Nighter sets your makeup effectively.
Step-by-Step Guide to Achieving the Perfect Winged Eyeliner

This guide provides a step-by-step process to master the perfect winged eyeliner.
Step 1: Preparation
Cleanse the eyelid to remove any oils or residue. Apply a primer to ensure the eyeliner stays put. Use a setting powder to prevent smudging.
Step 2: Drawing the Wing
Use a pen or liquid eyeliner for precision. Draw a thin line from the outer corner of the eye towards the end of the brow. Keep the angle consistent with the lower lash line.
Step 3: Connecting the Line
Draw a line from the tip of the wing towards the middle part of the upper lash line. This creates the outline for the wing. Ensure symmetry for both eyes.
Step 4: Filling In
Fill in the space between the wing and lash line with the same eyeliner. Use short, controlled strokes to avoid smudging. Make the line thicker towards the outer edge.
Step 5: Final Touches
Clean up any mistakes with a Q-tip dipped in makeup remover. Use concealer around the wing to sharpen the edges. Set the eyeliner with a translucent powder or setting spray for longevity.
Tips and Tricks for Different Eye Shapes
Winged eyeliner techniques can vary based on eye shape. Tailoring the application can enhance natural features and provide a balanced look.
Almond Eyes
Almond eyes can carry most eyeliner styles. To enhance them, I recommend starting with a thin line at the inner corner, thickening it gradually towards the outer edge. This accentuates their natural symmetry. Extend the wing slightly upwards to lift the eye. For added drama, try a double wing or add a bit of glitter along the line.
Hooded Eyes
When drawing winged eyeliner for hooded eyes, avoid thick lines which can make the eyes look smaller. Instead, I start with a thin line close to the lash line. I create a more noticeable wing by extending it straight out, not upwards. This gives an illusion of lifted eyes. Using waterproof eyeliner helps prevent transfer to the upper lid.
Round Eyes
For round eyes, it’s essential to elongate the shape. I start lining from the middle of the lid and extend out past the outer corner, keeping the line thin near the inner corner and gradually thickening it. This technique makes the eyes appear more oval. Smudging the liner slightly can also soften the look, making it appear less dramatic for daytime wear.
Common Mistakes to Avoid
Uneven Wings
Uneven wings occur when one side is thicker or longer. Ensure both sides start from the same point and extend at the same angle. Using a stencil or tape aids in maintaining symmetry.
Smudging
Smudging happens when the eyeliner transfers to other parts of the eyelid. Use a primer to create a smooth base and set the liner with a matching eyeshadow or setting powder.
Overuse of Product
Applying too much eyeliner makes it harder to control and correct errors. Use light, buildable strokes instead of heavy lines. This method allows better control and easier adjustment.
Incorrect Placement
Incorrect placement alters the desired shape. Align the liner with the lower lash line’s natural angle. Avoid stretching the skin as it distorts the line when released.
Not Enough Drying Time
Not allowing enough drying time causes transfer and smudging. Let each layer dry completely before adding another or closing the eyes. Patience ensures cleaner lines.
Ignoring Eye Shape
Ignoring your eye shape results in unflattering wings. Tailor the wing to your specific eye type, such as a shorter wing for round eyes. Customizing enhances your natural features.
Product Recommendations
To achieve the perfect winged eyeliner, a few key products enhance precision, longevity, and ease of application.
Liquid Eyeliners
Liquid liners offer precision and an intense look for winged eyeliner. My top choices include:
- Stila Stay All Day Waterproof Liquid Eyeliner: Known for its smudge-proof formula, this eyeliner ensures a crisp line that doesn’t fade, even through a long day.
- Kat Von D Tattoo Liner: With its ultra-fine tip, this liner allows for detailed work and perfect wings, ideal for both beginners and pros.
Gel Eyeliners
Gel eyeliners provide flexibility and a bold finish. Recommended options are:
- Maybelline Eye Studio Lasting Drama Gel Eyeliner: Comes with a brush for precise application, it’s long-lasting and intense.
- Bobbi Brown Long-Wear Gel Eyeliner: This high-end option glides smoothly, offering superior control and a durable look.
Pen Eyeliners
Pen eyeliners combine the ease of a pencil with the intensity of a liquid liner. Some favorites are:
- NYX Professional Makeup Epic Ink Liner: Delivers a waterproof, deep black line with an easy-to-use felt tip.
- Clio Waterproof Pen Liner Kill Black: This Korean beauty staple offers exceptional precision with a firm, smooth line that stays put.
Additional Tools
Supporting tools can further perfect your winged eyeliner look. Consider these:
- Sephora Collection Pro Angled Liner Brush #22: Essential for gel liners, this brush ensures precise wings.
- e.l.f. Cosmetics Eye Makeup Remover Pen: Corrects mistakes effortlessly, making it ideal for on-the-go touch-ups.
- LCELENE Eyeliner Stencils: Ideal for those learning, these stencils guide the perfect wing every time.
Using these products simplifies the process and improves results, making it easier to achieve flawless winged eyeliner.


 Founder of Divine Glamour Trail, a platform that delivers the latest news and updates on hairstyle trends, beauty secrets, and skincare advice. With a passion for timeless fashion and a commitment to offering expert style guidance, Jeffreyon shares tips and insights that inspire readers to elevate their personal style. His platform blends modern trends with classic elegance, offering practical advice that empowers individuals to feel confident and look their best. Divine Glamour Trail has become a trusted source for anyone seeking to stay current in the world of fashion and beauty.
